This is the fifth in a series of articles from guest writer Stephen Berer focusing on literacies, fluencies, and projects for museums and classrooms. If you missed them, you can read the first article in the series here, the second here, the third here, and the fourth here.
To review where we stood at the end of my last article:
We were exploring the Freer Gallery of Asian Art. I presented my first project, ‘Exploring Cultural Diversity,’ in which I described how to create a video or slideshow with sound overlays, comparing objects in the museum to each other and to objects seen elsewhere.
This is a great project for developing critical thinking skills, and for building awareness of how people around the globe have very similar concerns and interests.
Yet, we humans have a remarkable ability to frame and color our world very differently! Although the human genome has very little variation from person to person, the human mind is as diverse as nature itself.
In this project, rather than comparing and contrasting objects, students will be challenged to creatively respond to objects that they find particularly engaging or mysterious. Their task is to try to see those works of art accurately and to develop a relationship with them.
As in the first project, teachers and chaperons can act as coaches by pointing out interesting details, asking and answering questions, and providing feedback to the work that students are producing.
Find 3 objects in the museum. First, describe each of them accurately in words. Second, draw each of them. Finally write a poem or story about each of them, or create counterpart drawings to them. Students can work individually or in teams of 3. Students should be sure to photograph each object and its label, and also record the room they’re each in.
Teams should begin by discussing the object, deciding who takes on each task, and coming up with creative ideas for the poem/story/counterpart drawing.
Find 3 objects in the museum that you think are particularly beautiful or thought provoking. Accurately describe them, sketch them, and write a poem or story about them, or make a counterpart drawing.
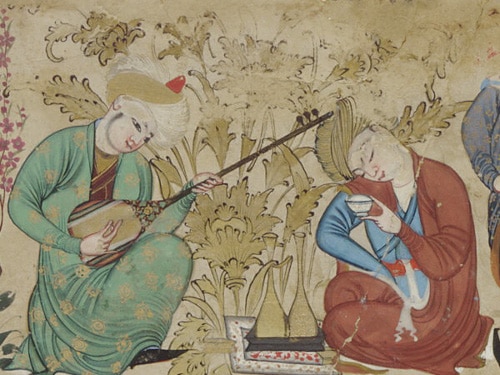
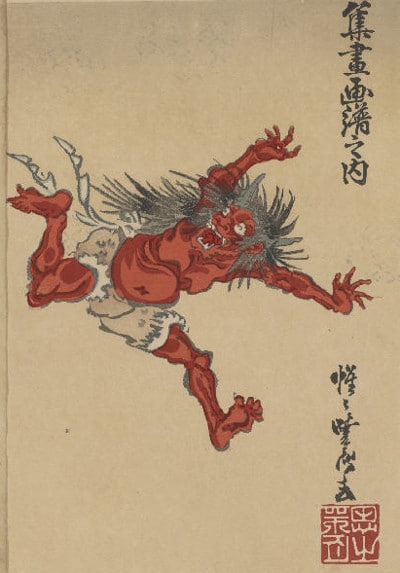
(A project-group’s summary:) Our group chose the 3 paintings that you will find illustrating this article. We began by taking a quick tour through the whole gallery to locate paintings and objects we liked, noting their rooms. We decided to stick to paintings, and each of us got to pick one.
Although there were many we liked, we realized we didn’t have time to ponder. After about 15 minutes we each had a painting that we thought would be fun to work on.
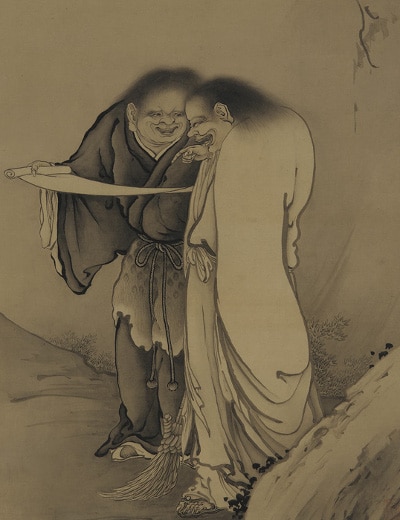
The first painting was ‘Taoist Immortals’, a humorous and appealing ink drawing from Japan. Since none of us was strong in art, we decided to switch roles with each painting, so each of us would have a chance to write a description, to do some creative writing, and to try our hand at drawing.
We first studied the painting and then talked about what we could see in it. Two questions jumped out: 1. why were the immortals laughing, and 2. why would immortals have a broom?
We then got to work. The person who had to do the drawing tried a couple of sketches and wanted to tear them out and rip them up. It was really hard. Just then our teacher showed up and we asked him if we could skip the drawing part. “Absolutely not!” he answered.
What he told us was that creativity begins when we overcome our fears, and try to stop judging ourselves.
This was not about proving that we were the next Rembrandt, but about understanding how to translate what we see, through our hand, onto a piece of paper. Our teacher, who was not an artist either, then pulled out his notebook and pencil and showed us how he’d start. He said there were 2 ways:
He also reminded us to keep all of our rejects and notes. We would use them in our class presentation.
It turned out, the hardest part for each of us was writing the poem or story. We each felt like the painting we were working from was fascinating, and we wanted to create a story as interesting as the picture. We worked as a group to brain-storm ideas briefly; then the writer got to work. Each of us had a decent first draft by the time we had to leave, but we all felt like we needed to work on it more. All told, we spent about an hour and 45 minutes in the museum.
If you know the Freer’s collection and what’s on display, you might be inclined to assign specific objects. But remember, one of the virtues of this museum is that curators constantly change the exhibits. What you saw last year or even last month may not be on exhibit the next time you visit. Therefore, avoid relying on specific objects to build your project.
Be sure to specify guidelines. Here’s a sample of a brief set of guidelines:
“Your description should be 2 full paragraphs that carefully and accurately discuss the appearance of the object, the materials from which it was made, basic shapes and colors, originating country and artist if known. If the label provides information about the image/object and it’s background, use that to do research outside the museum to prepare a fuller description of the object, its history, and the story it’s telling.
Your sketch should be a schematic diagram with notes describing the painting/object, its details, sense of movement, areas of striking color, and what you perceive as the focus point(s). Or if you prefer, attempt to make a copy of the object.
If you write a poem, it should be in the sonnet form; otherwise write 3 different haikus for each object. If you write a story, it should be at least a full page long, opening with a problem and ending with a solution. If you draw a counterpart image, it should be carefully drawn, with attention to form, (color?), and detail. It should have a clear relationship to the original painting.”
An alternative challenge: You might have your students choose two portraits. Have them imagine the people in the portraits are in love, and they are writing an exchange of love poems or love letters. If the portraits originated from different cultures or regions, you might frame it as a Romeo and Juliet situation, or you might have the lovers talk a little bit about what life is like in their country or city, and where they can meet and what they can do.
High school students working alone will probably need an hour per object/painting to complete their description, sketch, and poem/story. Working in 3-person teams, high school students should be able to complete one set in 30-45 minutes. Middle school students will probably complete their work more quickly. Your mileage may vary.
In my next article in two weeks I will begin an exploration of the United States Holocaust Memorial Museum (USHMM). I will begin with a general description of the museum and best practice for preparing yourself and your students. I will follow that with two projects to develop an insightful understanding of this very troubling 12 year period in history. Besides helping to learn the history of the Holocaust era, these projects are meant to promote sensitivity and respect for those who are outsiders, or who don’t have a strong support system.
Steve Berer is an educator, author, and founder of Museum Exploration Partners, an independent education company that strives to turn your trip to Washington into a life-changing experience. Visit them at musexplore.net.