This is the fourth in a series of articles from guest writer Stephen Berer focusing on literacies, fluencies, and projects for museums and classrooms. If you missed them, you can read the first article in the series here, the second here, and the third here.
To review where we stood at the end of my last article:
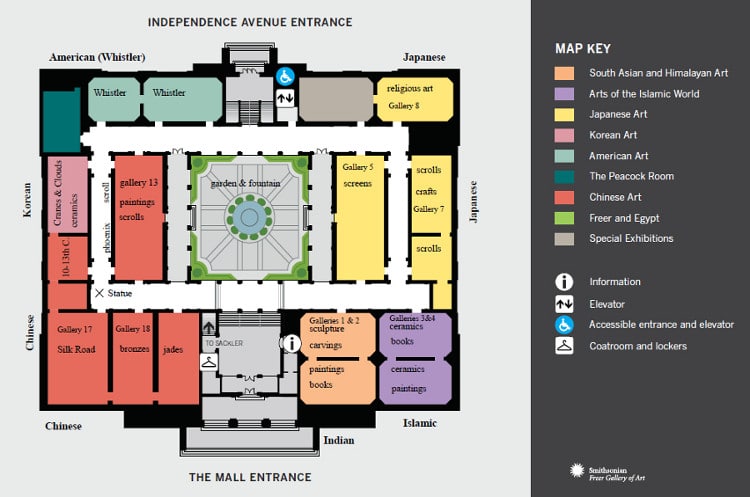
I’ve just led you into the Freer Gallery, a meditative museum of Asian art on the Mall in Washington, DC. We’ve taken a quick stroll around the hallway that circles the 18 rooms of the main collection, and seen a vast variety of remarkable objects. These objects may seem very foreign and unapproachable to students (and teachers) who may only be familiar with Renaissance, Impressionist, and modern art, and who have been educated with Western points of view concerning art, religion, and nature.
I presented you with the problem: “How are we to remember even a fraction of what we’re seeing, and how can we possibly understand it’s meaning and context, given the collection’s diversity in time and place,” not to mention its foreignness? I then suggested a solution to the problem: provide your students with a choice of projects, team them up in groups of 3-4, and set them loose. Preferably, begin preparing for the project in class, so that when you get to the museum, you’ll hit the ground running.
Finally, I promised you two great projects that you could use as templates, easily modifiable to suit your students and your curriculum. Here they are...
In this project your students will compare objects in the museum to each other and to objects they have seen elsewhere. Teachers and chaperons can act as coaches by pointing out interesting details, asking and answering questions, and giving feedback to the ideas and images your students are compiling.
Project outline:
Create a video or slideshow with sound overlays presenting 3 objects in the museum, and comparing them with objects from other rooms in the museum and objects from their own experience outside the museum.
Tools needed:
Job assignments (which students can share):
Time frame:
Knowledge enhancements:
Find 3 different kinds of objects in the museum and compare multiple examples of them.
Step 1:
(A project-group’s summary:) Our group chose sculpture as one object type we wanted to study. We broke up and each person had 5 minutes to research a quadrant of the building, bringing back relevant photos, and being sure to note which room each photo came from. Actually, over 15 minutes passed before we were all back together again.
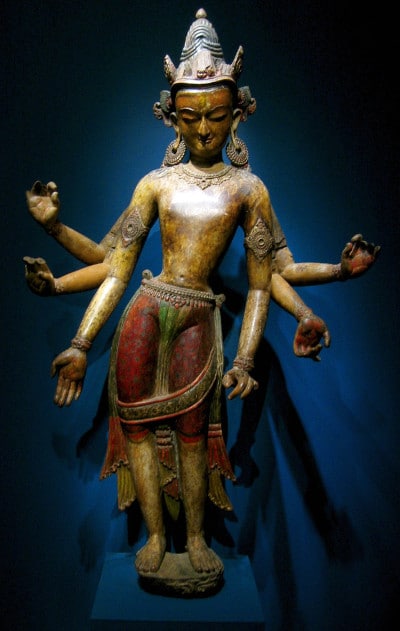
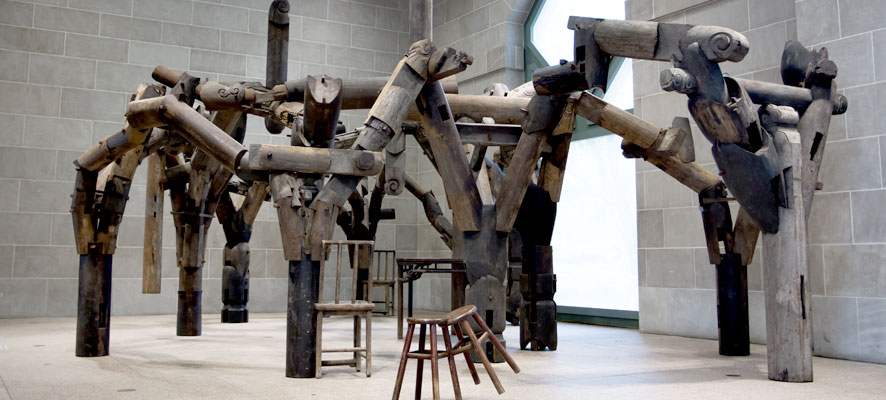
We reviewed everyone’s photos. It took a while for us to decide we wanted to compare distinctly different kinds of sculpture, created in different places and meant to convey very different kinds of information. We finally chose three objects to work on. This took us another 20 minutes. Notice the 3 images accompanying this article: they are the 3 sculptures we chose.
Step 2:
We then went back to each object. One of us videoed the objects giving a 180-360 degree pan-around, and then some pan-ins to capture interesting, odd, or problematical details. The videographer also panned around the whole room, so we could present a better sense of cultural and artistic context in our video.
Another person photographed the labels and prepared written paraphrases of them, along with notes about materials, historical era, sculptor, original location, and other important details, including details gleaned from other objects and labels in the room.
The other 2 of us decided we would use an interview format, to dramatize the sculptures and compare and contrast their likely or imagined purpose. We began to prepare a set of questions and imaginary answers.
While we were working we had a brainstorm: we stepped out of the cultural framework of the statues, and decided to ask them questions as if they were people living in a different place and time. We imagined the Japanese guard as an American soldier just back from a tour of duty in Afghanistan. We wondered: perhaps the Nepalese Buddha was a muse talking to the poet Walt Whitman; would he be the most likely poet this muse would talk to? We argued about whether the Ai WeiWei was a ruins left after Genghis Khan or after the bombing of Hiroshima. When we told the other members of the group about our brainstorm, they were a little skeptical. They liked the idea of doing interviews, but they wondered if stepping out of the time-frame might take us off topic.
By the time the videoing was done, another 35 minutes had passed. We only had 15 minutes left before we had to meet at the front door! Just then our teacher came into the room to check on us, so we decided to present our dilemma to her. It seemed other groups were having the same problem. She suggested we focus on what we had developed so far, add another sculpture, and work on our dialogs.
1. Decrease the number of objects covered:
By decreasing the number of objects you can encourage your students to find more comparative objects in and outside the museum. Or you might have them deepen their analysis of how the objects were produced, what their purpose was, the cultural contexts from which they arose, and what the objects might have looked like had they been produced in other times and other places.
2. Focus on individual rooms, rather than similar objects:
You might use this exercise as a cultural survey more than as a comparative analysis. Rather than choosing objects, let each group choose the room they want to study and have them produce a careful overview of the objects in the room, with attention to chronology, religious vs. secular intentions, changing styles, and/or different materials. Each group should choose a backup room, so there’s only one group in a room.
3. Simplify:
If you’re concerned that this is a little too challenging for your students, you might try providing more structure to help guide them.
In two weeks, with Part 3, I will complete this exploration of the Freer & Sackler with Project 2: Responding to Beauty.
Steve Berer is an educator, author, and founder of Museum Exploration Partners, an independent education company that strives to turn your trip to Washington into a life-changing experience. Visit them at musexplore.net.